Complete Guide on How to Regas Your Car’s Air Conditioning Yourself
If refrigerant runs low – from natural leaks or wear – cooling falters, the compressor starves for oil mixed in with it, and you risk burnout or seized parts. Keeping levels topped up isn’t just about comfort; it’s smart prevention against breakdowns that could set you back hundreds.
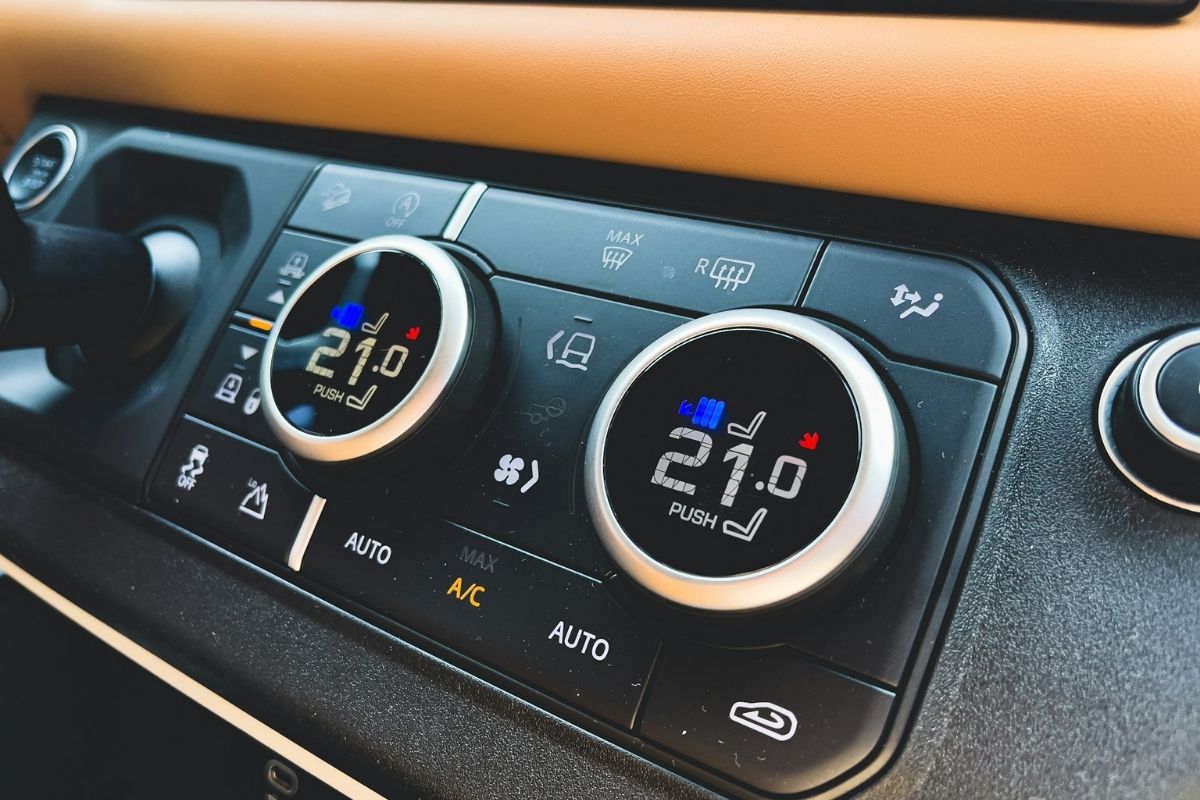
Imagine driving through a scorching summer day with the windows up – that’s where your car’s air con shines, turning hot cabin air into a refreshing breeze. At its heart, the system relies on refrigerant circulating through clever components: the compressor squeezes the gas to high pressure, the condenser (up front by the radiator) cools it into a liquid by dumping heat outside, and the evaporator inside the dash soaks up interior warmth as the refrigerant evaporates again, chilling the air the blower pushes your way. There’s also the expansion valve to control flow and an accumulator to trap moisture and debris.
Now imagine that your air‑con gas is low or has leaked out – suddenly that crisp, cool air turns lukewarm or vanishes entirely, leaving you stuck in a hot, stuffy cabin with no relief, no matter how high you turn the fan.
Signs Your Car’s Air Conditioning Needs Regassing
The clearest sign is simply that the air coming from your vents is no longer as cold as it used to be. In mild weather, this can go unnoticed, but on a hot day, you will find yourself cranking the fan to maximum and still feeling little relief. If the air is tepid or barely cool even on the coldest setting, low aircon gas is the first thing to suspect.
You may also notice that the system takes significantly longer to cool the cabin than it once did. In a properly charged system, the air should be noticeably cold within a minute or two of switching on. If it takes five or ten minutes, or never quite reaches a satisfying temperature, the refrigerant level is likely below the optimal range.
Listen carefully when the AC is running. A hissing sound – particularly from under the bonnet near the compressor or along the hoses – can indicate refrigerant escaping through a small leak. Bubbling or gurgling noises from the dashboard area suggest that air has entered the low‑pressure side of the circuit, often a sign that levels have dropped enough for vapour pockets to form where liquid refrigerant should be.
Another indicator is the compressor clutch cycling on and off more frequently than usual, or failing to engage at all. Most modern compressors have a pressure‑sensitive cut‑out that prevents them from running when refrigerant is too low – a safety feature that protects the compressor from running without lubrication. If you can see the clutch plate at the front of the compressor and it is not spinning with the engine, low pressure may be the cause.
If symptoms persist after a regas, or if the system loses charge again within a few weeks, there is almost certainly a leak that needs professional diagnosis and repair before a regas will hold long‑term.
Tools and Materials Needed for DIY Regassing
Before you begin, it is worth investing in the right equipment rather than the cheapest option available. A poorly made gauge or a mismatched refrigerant canister can turn a simple job into a costly mistake. You’ll want:
- DIY Air Conditioning Recharge Kit: comes with a refrigerant canister (the right type for your car), snap‑on hose, and trigger for controlled release.
- Safety Gloves: tough, rubberised ones to fend off freezing burns from any spills.
- Goggles: sealed safety specs to protect your peepers from sudden leaks.
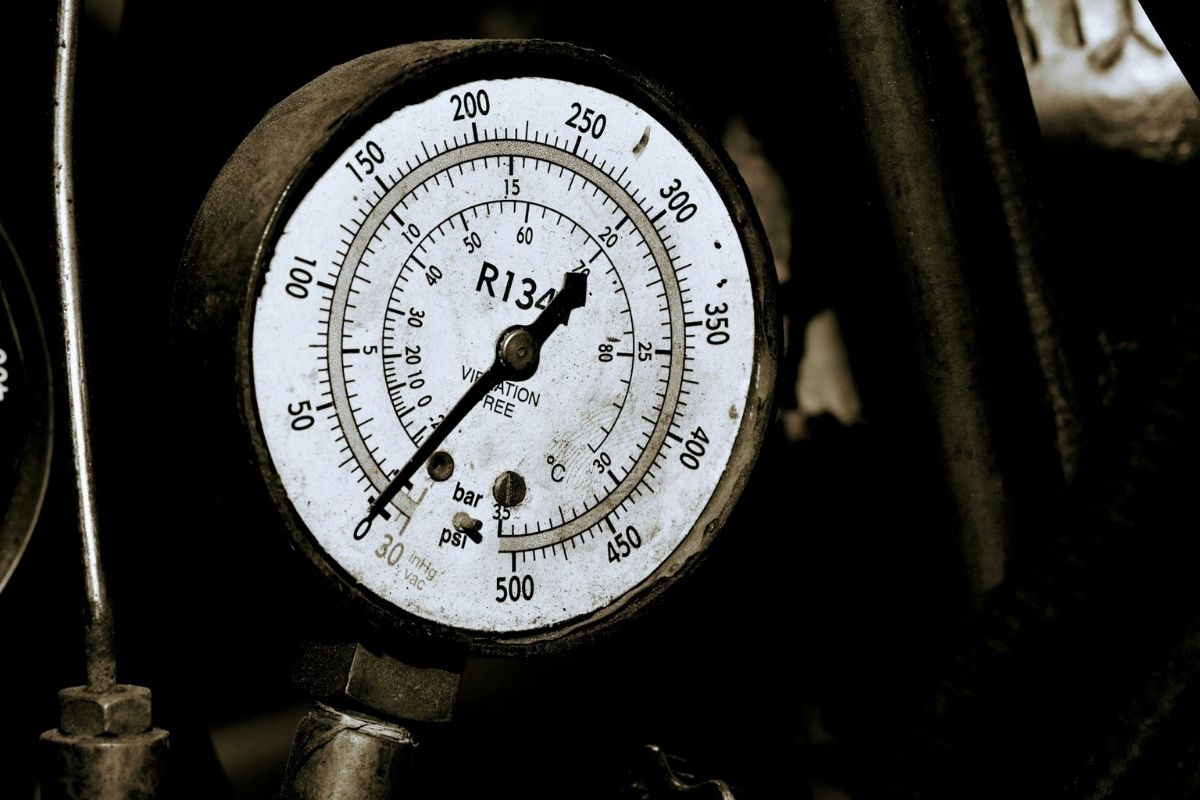
- Pressure Gauge: go for a proper manifold set with low/high dials over cheap single‑gauge kits – accuracy matters.
These bits let you connect safely, read pressures like a pro, and dodge overfilling disasters. Grab trusted makes from auto shops; chuck in a cheap ambient thermometer too, as target pressures shift with the weather. It’s a small outlay for peace of mind.
Step-by-Step Regassing Guide
This job is manageable for a careful DIYer and typically takes under 30 minutes from start to finish.
Step 1: Prepare the Vehicle and Workspace
Choose a flat, open area with good airflow – a driveway or garage forecourt works well, but avoid enclosed spaces where refrigerant fumes could accumulate. Engage the handbrake, switch off the engine, and allow it to cool for at least an hour if it has been running. Open the bonnet and move aside any covers or engine‑bay accessories that might obstruct access to the AC components. Lay your tools out within easy reach before you begin.
Step 2: Locate the Low-Pressure Service Port
The AC circuit has two service ports: a low‑pressure port and a high‑pressure port. You must only connect to the low‑pressure port. To find it, follow the wider of the two aluminium pipes running from the compressor – this pipe is typically 3 to 4 cm in diameter and runs toward the bulkhead at the back of the engine bay. The low‑pressure port is capped with a black or blue plastic cover and marked with the letter “L”. The high‑pressure port, marked “H”, has a narrower fitting and is usually positioned closer to the condenser at the front of the car. Connecting the charge kit to the high‑pressure port while the engine is running can cause the canister to burst – treat this as a hard rule, not a suggestion.
Step 3: Connect the Kit and Check Static Pressure
With the engine still off, remove the dust cap from the low‑pressure port and inspect the port for any dirt or debris. Clip the charge‑hose connector firmly onto the port – you should feel it click into place. If you hear a prolonged hiss of escaping gas when connecting, the fitting is not fully seated; release it and try again. Connect the manifold gauge set with the blue hose to the low‑pressure port and the red hose to the high‑pressure port if accessible, then note the static pressure reading. A system with some refrigerant remaining will typically show a balanced static pressure on both sides; a completely flat system will read zero.
Step 4: Add Refrigerant and Monitor Pressure
Start the engine and turn the AC on to its maximum cold setting, with the recirculation mode engaged and the fan running at full speed. This maximises the load on the system and gives you the most accurate pressure readings. Watch the compressor at the front of the engine – you should see the clutch plate begin to spin as the compressor engages. If it does not engage at all, the system pressure may be too low for the safety cut‑out to allow operation; in this case, a short burst of refrigerant with the engine off can sometimes raise pressure enough for the clutch to engage.
Hold the refrigerant canister upside‑down – this ensures liquid refrigerant enters the system rather than vapour, which charges faster and more accurately. Add gas in short bursts of around 10 seconds, pausing between each to allow the pressure to stabilise and give you an accurate reading. On a warm day (around 24°C ambient), the low‑side pressure should settle in the range of 25 to 45 psi, with 35 psi being a common target. The high‑side should read between 150 and 250 psi. Stop adding refrigerant as soon as you reach the lower end of the target range – it is safer to be slightly under than over. If the low‑side pressure rises above 55 psi, or the high‑side exceeds 300 psi, stop immediately and allow the system to run for a few minutes before reassessing.
Step 5: Disconnect and Test
Once you have reached the target pressure, disconnect the charge hose with the engine still running – this allows any residual refrigerant in the hose to purge safely rather than spilling. Replace the dust cap on the service port and tighten it by hand. Rev the engine briefly to around 2,000 rpm and hold a thermometer in front of the centre vent; a well‑charged system should be delivering air at 5 to 10°C. Run the AC for at least 10 minutes to allow the system to stabilise and confirm that the compressor clutch remains engaged throughout. If the vent temperature does not drop below 15°C, or the clutch cycles off and will not re‑engage, there may be a residual leak or an underlying fault requiring professional attention.
Always work with a light breeze at your back so that any refrigerant vapour disperses away from you, and keep gloves and goggles on until the hose is fully disconnected and the caps are back in place.
R134a vs. R1234yf: Choosing the Right Refrigerant
Getting the refrigerant type right is not optional – using the wrong gas will damage seals, reduce cooling performance, and could void your warranty or fail an MOT inspection.
R134a was the standard refrigerant for virtually all passenger cars sold from the early 1990s through to the mid‑2010s. It is effective, widely available, and inexpensive – a 450 g canister typically costs £15 to £20. Its major drawback is its environmental impact: R134a has a global warming potential (GWP) of 1,430, meaning it is 1,430 times more potent than carbon dioxide as a greenhouse gas if released into the atmosphere. For this reason, EU regulations phased it out of new vehicles from 2017 onwards.
R1234yf was developed specifically to replace R134a in response to those regulations. Its GWP is just 4, making it vastly more environmentally responsible. It also offers slightly better thermodynamic efficiency, meaning the system works a little less hard for the same cooling effect. The trade‑offs are cost – a canister of R1234yf can cost four to five times more than an equivalent R134a – and the fact that it is mildly flammable, which is why systems using it have slightly different service‑port designs to prevent accidental cross‑contamination. Specialised adapters.
To confirm which refrigerant your car uses, check the sticker on the under‑bonnet label near the AC components – it will clearly state the refrigerant type and the correct charge weight in grams. You can also find this information in the owner’s manual or by entering your VIN into an online vehicle‑data lookup. When in doubt, ask at a parts counter before purchasing – most motor factors and online retailers stock both types and can advise based on your registration number.
Maintenance Tips to Prolong Your AC System’s Life
The best way to avoid a failed regas is to keep the system in good condition throughout the year, not just in summer.
- Run the AC for at least 10 minutes every week, even in winter. This keeps the compressor seals lubricated and prevents the clutch from developing flat spots from prolonged inactivity. Many cars allow you to run the AC alongside the heating system, so there is no need to freeze – simply set the temperature to a comfortable level and switch the AC on.
- Check for leaks periodically, especially after the system has been idle over winter. Apply a small amount of soapy water to the joints, hose connections, and service‑port caps, then start the system and watch for bubbles forming. Even a slow leak will reveal itself this way. UV dye can also be added to the refrigerant to make leak detection easier with a UV torch – some recharge kits include a small amount of dye for this purpose.
- Replace the cabin‑air filter at least once a year, or more frequently if you drive in dusty or heavily polluted environments. A clogged filter restricts airflow across the evaporator, reducing cooling efficiency and placing extra strain on the blower motor. On most cars, the filter is behind the glovebox and takes less than 10 minutes to change.
- Inspect the compressor drive belt for cracking, fraying, or glazing – a slipping belt reduces compressor efficiency and eventually causes it to stop driving altogether. Also, check the condenser at the front of the car for debris. Insects, leaves, and road grime can accumulate between the condenser fins and restrict airflow, significantly reducing the system’s ability to shed heat.
- Book a professional AC service every one to two years. A garage with the proper recovery equipment can evacuate and weigh the old charge, pull a vacuum on the system to draw out moisture and air, and recharge to the exact factory specification. This level of precision is not achievable with DIY equipment, and the vacuum stage is particularly important – moisture left in the system reacts with refrigerant to form acids that corrode the compressor and expansion valve from the inside.
Is DIY Regassing Worth It?
For a straightforward top‑up on a system with no underlying faults, DIY regassing offers real savings. A complete kit costs between £25 and £40, compared to £150 to £250 at a garage for an equivalent service. The job itself requires no mechanical experience beyond basic familiarity with your engine bay, and the kit can be reused for future top‑ups or shared with other vehicles.
The convenience factor is equally valuable. There is no need to book an appointment, leave your car for a day, or arrange alternative transport. Many drivers find it satisfying to carry out basic maintenance themselves, and understanding how your AC system works makes you a better‑informed customer when you do need professional work.
That said, DIY regassing has its limits. If your system is losing charge regularly – needing a top‑up more than once every couple of years – there is a leak that a canister of refrigerant will not fix. In these cases, DIY top‑ups become a recurring expense that masks the real problem. Pairing a regas with a professional leak test, or using UV dye and a torch to locate the source yourself, is the only way to achieve a lasting repair. Similarly, if the compressor is not engaging, the expansion valve is blocked, or there is visible oil staining around joints indicating a significant leak, professional diagnosis is the right first step before spending money on refrigerant.


